


Hula Hoop tricks for beginners: step-by-step guide
Hula Hoop tricks often look spectacular, but start with simple, controlled movements. The important thing is not to learn as many tricks as quickly as possible, but rather to better understand the hoop, your body and your timing step by step.
What are these instructions based on?
These instructions draw on our many years of experience with Hula Hoops, practical work with different hoop types and customer guidance since 2007. You can find more background on the related pages About Hoopomania and Our development.
Which hula hoop tricks are suitable for beginners?
Begin with tricks in which the hoop stays close to your body and you can stop at any time. Suitable examples include bringing one arm into the hoop, hooping upwards and downwards, controlled transitions towards the neck and your first Penguin movements. Neck hooping is not a first beginner trick and should be introduced later.
| Trick | Difficulty | What you learn | Important for beginners |
|---|---|---|---|
| Arm in the hoop | easy | Get one arm into the hoop. | Basis for several later transitions. |
| Hooping up | easy to intermediate | Move the hoop towards your upper body. | Trick technique, not normal basic technique. |
| Hooping down | intermediate | Guide the hoop back towards your hips. | Choose your arm order and timing consciously. |
| Hooping on the neck | intermediate | Control the hoop briefly in a higher position. | Not a first trick for beginners. Only practice after safely hooping upwards and controlled arm transitions. |
| Penguin hooping | intermediate | Guide the hoop upwards with small shoulder and arm movements. | Only try this once your arm transitions are more secure. |
Before you start: hoop, space and pace
Hula Hoop tricks work best with a controllable hoop. A hoop that is too heavy can make off-body movements difficult, while a very small hoop may feel too fast at first. For classic tricks, Hoop Dance and transitions, lighter hoops without massage elements are usually more suitable than heavy fitness or massage hoops. The hoop should be easy to guide and should not create uncomfortable pressure.
Recommended exercise order
A sensible learning sequence is to practise one arm in the hoop first, followed by upward hooping, the transition beneath the armpits and then downward hooping. Only add neck hooping and Penguin Hooping once you can control the earlier movements.
Example of a 10-minute trick session
| Time | Exercise | Goal |
|---|---|---|
| 2 minutes | Basic hooping | Find a steady rhythm. |
| 2 minutes | Arm in the hoop | Practice arm position without pressure. |
| 2 minutes | Hooping up | Guide the point of contact upwards in a controlled way. |
| 1 minute | Break | Relax your shoulders and neck. |
| 2 minutes | Hooping down | Timing for changing arms and returning to the hips. |
| 1 minute | Relaxed basic hooping | Simple trick or basic movement. |
Hooping up
A classic hula hoop move is to move the hoop upwards from the hips towards the neck. The technique is simple in principle, but requires precision. Standing on tiptoe or simply wishing the hoop upwards will not make the movement work.
With normal basic hooping, the movement remains small and rhythmic. For targeted upward hooping, the contact movement temporarily increases and moves upwards with the hoop. What matters are controlled impulses below the hoop, adjusted contact points and an even pace, not just large hip circles as a general rule.
To do this, stand in the middle of the hoop and try to draw a circle with your hip that you imagine extending beyond the edge of the hoop. You can also imagine that there is a pen attached to your hip that you can use to draw a large circle. The head remains still while the hips lead the circle.
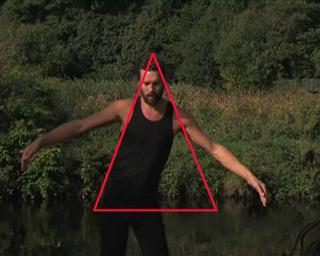
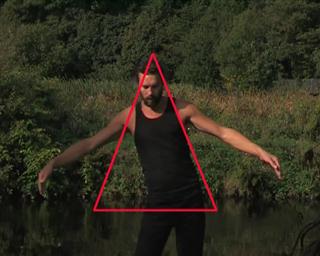
Imagine a cone: your hip draws the large circle at the bottom while your head remains still at the top. As soon as you make larger, more expansive movements, the hoop moves up your body. It's important that you support the hoop all the way: on the sides, front and especially on the back. Many beginners lose contact, especially at the back, because you can't see what's happening there. The hoop follows the natural shape of the body: first lower back, then lower chest, then shoulder blades.
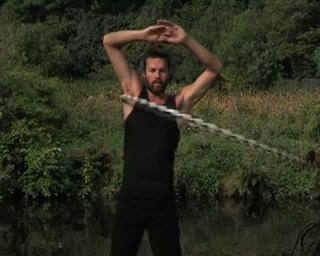
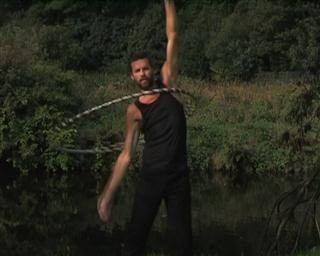
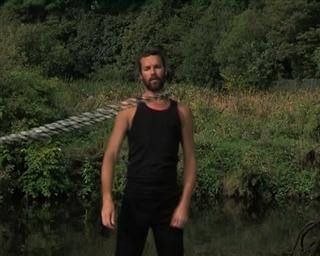
As the hoop approaches chest height, it can slide back down as you work against the shape of your body. This is easier with good chest control, but you can still learn the technique without this control. Make sure you anticipate the path of the hoop. As the hoop approaches the first arm, lower that arm and bring the shoulder inside the hoop. When the hoop comes towards your neck, straighten up and bring the second arm inside the hoop.
Hooping down
As you transition downwards, you will learn how to safely guide the hoop towards your hips from a higher position or into a new movement sequence. Start with a controlled movement at the neck. You have to decide which arm to move first. Many people automatically go with their stronger arm, but that's not always the easiest way.
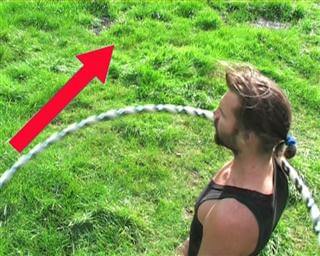
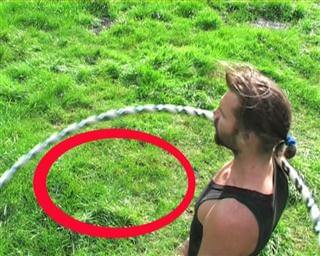
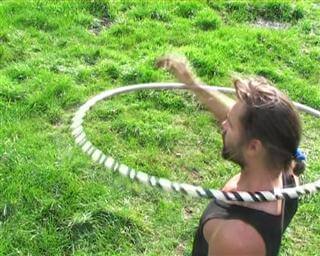
There is often more space for the first arm on the side to which the hoop opens. This can vary depending on the direction of rotation, body position and personal technique. Therefore, try out both sides instead of rigidly adopting a right/left rule.
It all depends on timing and judgment. Arm space is easier to see when the hoop is in front of the body. Once the first arm is fully raised, begin with the second arm. When both arms are up, the hoop drops down.
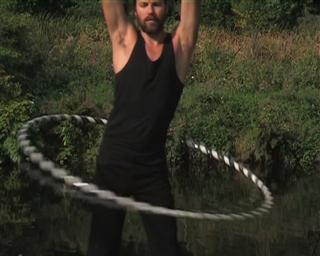
So that you catch it at hip height, make larger, calm hip circles again. This helps the hoop return to a controlled rhythm.
Penguin hooping
In Penguin Hooping, you guide the Hula Hoop from your hips towards your neck with short, alternating lifts of the arms and shoulders inside the hoop. Before trying this, become comfortable with continuing to hoop while one arm is inside.
First put the arm in the hoop that you lifted first in the previous movement. This is your starting arm. Try both sides and see whether right or left feels more natural. First keep your arm at the side of your body and continue hooping normally. The arm should not give the hoop any additional momentum, but should just move inside the hoop.
If the hoop keeps falling as you bring your arm inside, its position at the elbow is often the cause. When the elbow stays below the hoop, it is easier to support. If the elbow sits too far above it, the hoop loses support and slides down. Aim for a position that creates space without pushing the hoop away.
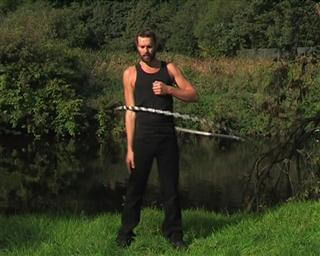
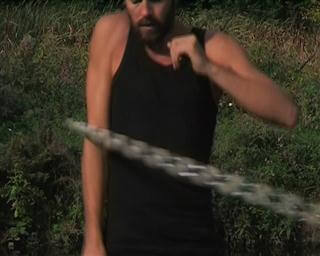
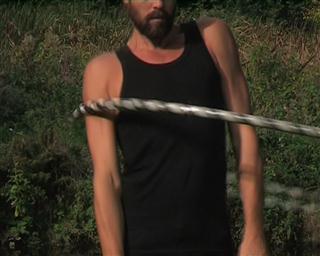
As soon as this becomes more stable, lift your shoulder briefly and clearly upwards while the hoop is in contact with your arm. The upper body remains upright, the shoulders work in a controlled manner and the arms do not actively push the hoop outwards. This creates an upward movement without disrupting the normal hooping motion. Then the second arm comes in: first take one arm in and lift it up, then guide the other arm into the space that becomes free.
In this phase, you largely stop the normal hip movement and work with alternating shoulder raises. With each lift, the hoop moves a little higher until it reaches the neck. Many beginners want to help with their arms. But that's exactly what often makes the trick unstable. Focus on straight, short shoulder raises.
Typical mistakes in hula hoop tricks
A heavy massage hoop can be useful for abdominal training, but is sluggish and uncomfortable for many tricks.
Tricks require more room to move than normal hip hooping. Consciously check the area beforehand.
Many tricks fail not because of skill, but because several movements are learned at the same time.
When the hoop falls, accurate timing usually helps more than pushing harder.
Which hula hoop is suitable for tricks?
For tricks, hoop dancing and flowing transitions, lighter hoops without massage knobs are usually useful. They react faster, are easier to control and are better suited for movements outside of classic abdominal training. Massage hula hoops can be suitable for fitness and weight loss, but they are not automatically the best choice for tricks.
| Goal | Suitable option | Note |
|---|---|---|
| First tricks | Lightweight, easy-to-control hoop without strong massage elements. | The hoop can be slightly larger at first so that it rotates more steadily. |
| Hoop dancing | Hoop dance, gymnastics or designer hoops. | The safer you become, the smaller and more reactive the hoop can be. |
| Fitness/weight loss | Fitness, massage or foam hoops depending on sensitivity. | These hoops are not automatically ideal for tricks. |
Frequently asked questions about hula hoop tricks
What hula hoop tricks can beginners learn?
Simple tricks such as hooping upwards, hooping downwards, arm transitions, controlled hooping towards the neck and the first penguin movements are suitable.
How long does it take to learn hula hoop tricks?
That depends on the hoop, body awareness and practice routine. Many simple movements become easier to understand after a few short sessions, but still require repetition.
Do you need a special hoop for tricks?
For many tricks, a light, easy-to-control hoop without strong massage elements makes more sense than a heavy massage hoop.
What is the easiest hula hoop trick?
For many beginners, controlled upward hooping or a simple arm transition is a good start because the hoop remains close to the body.
Which hoop is suitable for tricks?
Lightweight hoop dance, gymnastics or designer hoops are more suitable for tricks. For pure fitness or weight loss training, other types of hoops may make more sense.
Can you learn hula hoop tricks without prior knowledge?
Yes, but the basic movement should be controllable at least briefly. If you can't hold the hoop yet, it's better to start with Learn to hula hoop and simple basic exercises.
Is neck hooping suitable for beginners?
Not as a first beginner trick. Only practise neck-level movements once you can control upward hooping and arm transitions, and only with a light, smooth hoop without massage elements.
What should I do if the hoop hits the head or neck?
Stop immediately, simplify the technique and return to practising lower on the body. If pain, dizziness or discomfort occurs, stop exercising.
Conclusion