


Assembly instructions for the One Click Luxus clothes airer
Parts list for model E3: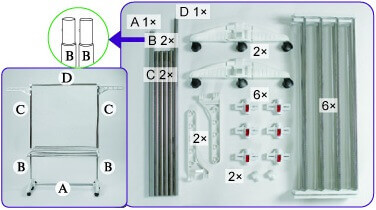
Parts list for model E4: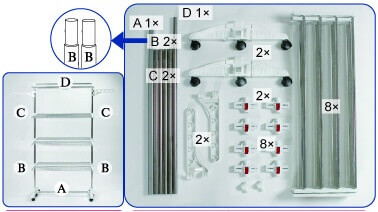
Instructions for safe use (please read carefully before assembly):
1. Assemble the One Click clothes airer only as described in these instructions. Before starting, check all parts for sharp points or edges.
2. Do not allow children to play with the clothes airer unsupervised.
3. Too much laundry can damage the folding wings. Do not exceed the recommended load of 5 kg and remove items if the wings bend noticeably.
4. Never dry laundry near an open flame or directly in front of a heater, as this creates a fire risk.
5. Protect the clothes airer from heavy impacts, which may damage or break its components.
This product is intended solely for drying laundry. Children and people with limited physical or cognitive abilities should only use or approach it under appropriate supervision. The product video can also help you follow the assembly sequence. Watch the assembly video.
Before you begin:
Keep these instructions within reach and compare each step with the illustrations. The product images in the shop provide additional views of the assembled clothes airer. Check the E3 or E4 parts list first and make sure every required component is present.
Step 1: Fit the wings to the locking brackets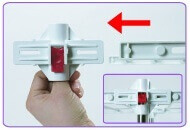
Insert the six wing sections into the One Click locking brackets from both sides, following the direction of the arrow in the illustration. An audible click confirms that a wing is locked in place. Repeat the process for all remaining wings and brackets.
Step 2: Assemble the feet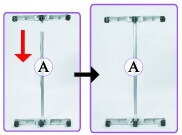
Take the two feet and insert bar A into the central opening of each foot. Press the bar carefully into the openings until it is firmly seated. This creates the base of the One Click clothes airer.
Step 3: Attach bars B and C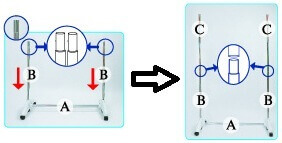
Insert the two B bars into the central openings in the feet and press them down until they are secure. Make sure the recessed ends face upwards, as shown in step 3. Fit one C bar onto each B bar and check that all connections are firm.
Step 4: Install the folding wings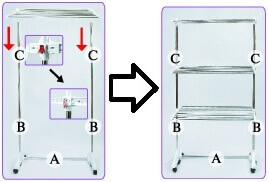
Slide each locking bracket down over a C bar and position the wing at the required height. Arrange the wings on three levels to leave enough room for laundry. Use the red button to lock each wing in place, and make sure it is released before moving a wing.
Step 5: Fit the connectors and bar D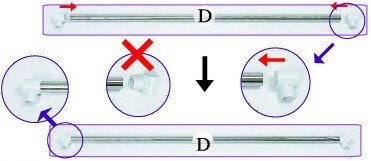
Insert one connector into each end of bar D and make sure both are firmly seated. Then place bar D on top of the C bars. The main frame should now be stable.
Step 6: Attach the two side arms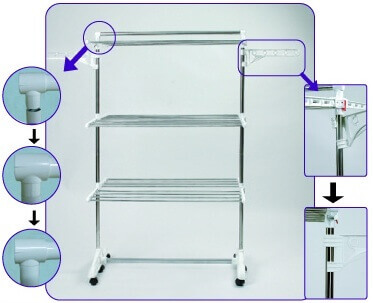
Clip the two side arms to the outside of the C bars so that they point outwards. They can be used for individual garments and may be moved slightly lower if required. The One Click clothes airer is now assembled.
How to fold the wings and feet: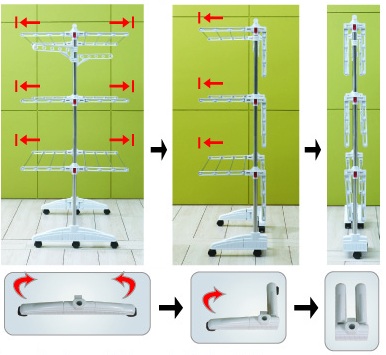
When the clothes airer is not in use, it can be folded to save space. Apply light pressure to one side until the wing section folds in, then fold the other side carefully. The feet fold inwards in the same way. Always follow the direction shown in the illustration and never force a locked component.
View the One Click Luxus clothes airers >>>
More useful information is available in our Hoopomania instructions.